Final Project Database Systems 2018
29/04/2018Group Members:
- Jerdy Tjandra (2101718450)
- Muhamad Aria Armada Djojosugito (2101718500)
- Fauzan Ihsan (2101720700)
Background
Our background motive in making this game store proposal is because we love to play games. As an side effect of that love we also want to understand everything there is to game, from why and how to make one to how to sell or do business with games. On the particular note of doing business, we would like to think and recreate it as realistic as possible the asset management side of a common game store found anywhere in the world.
Idea
The idea of this game store is a store which provide arcade games and also sells console plus pc games, thus the asset of the store must be divided into 2 categories which is arcade and normal games. Plus there would be a “money”,”coin” and ”prizes” categories. The arcade games required a unique coin that needs to be inserted otherwise the game won’t run, therefore the customer has to trade their money for the unique coin that the store already provide. The arcade games also provides different kinds of challenges for the customers and the store will reward the customer who won the challenges by giving them prizes based on the difficulty of the challenges.
Roles
- Muhamad Aria Armada : MySQL, Documentation.
- Jerdy Tjandra : MySQL, Entity-relationship diagram, VB.NET.
- Fauzan Ihsan : MySQL, Documentation.
Entity-Relationship model
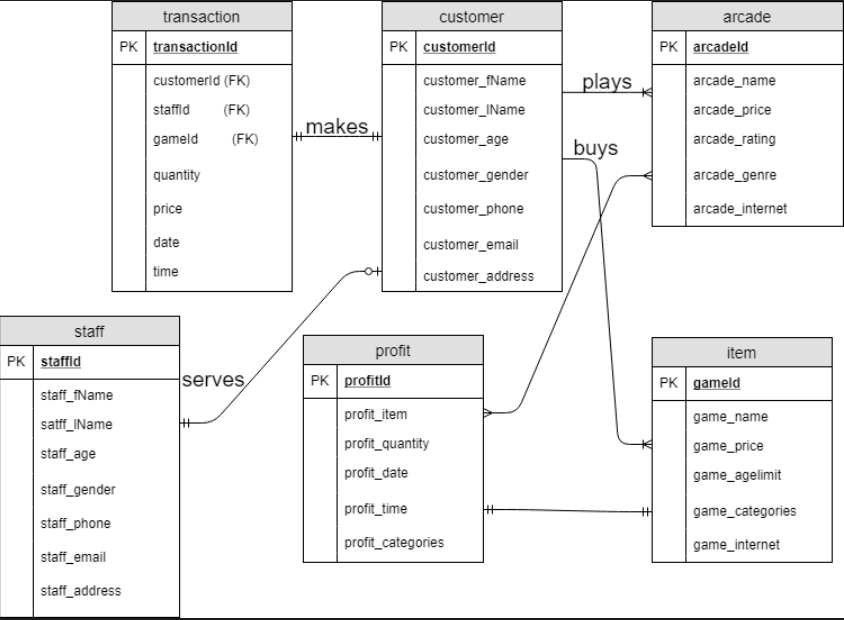
Relational Schema
- Transaction (transactionId, staffId, customerId, gameId, arcadeId, quantity, price, date, time)
Foreign Key staffId references staff(staffId) on update cascade on delete cascade
Foreign Key customerId references customer(customerId) on update cascade on delete cascade
Foreign Key gameId references game(gameId) on update cascade on delete cascade
Foreign Key arcadeId references arcade (arcadeId) on update cascade on delete cascade
- customer (customerId, customer_fName, customer_lName, customer_age, customer_gender, customer_phone, customer_email, customer_address)
- staff (staffId, staff_fName, staff_lName, staff_age, staff_gender, staff_phone, staff_email, staff_address)
- game (gameId, game_name, game_price, game_agelimit, game_categories, game_internet)
- arcade (arcadeId, arcade_name, arcade_price, arcade_agelimit, arcade_categories, arcade_internet)
- profit (profit, profit _name, profit _quantity, profit _price, profit _date, profit _time)
Game All-Store
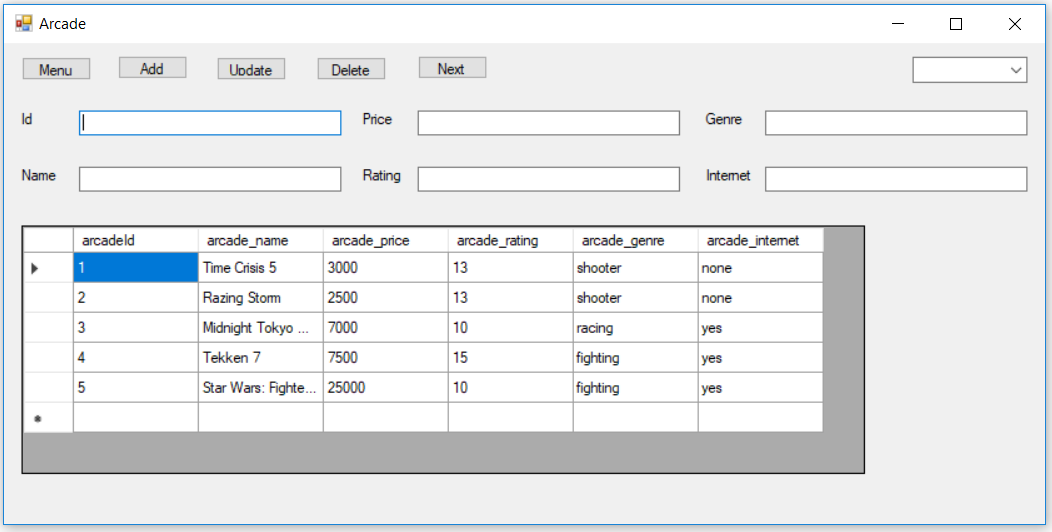
Arcade

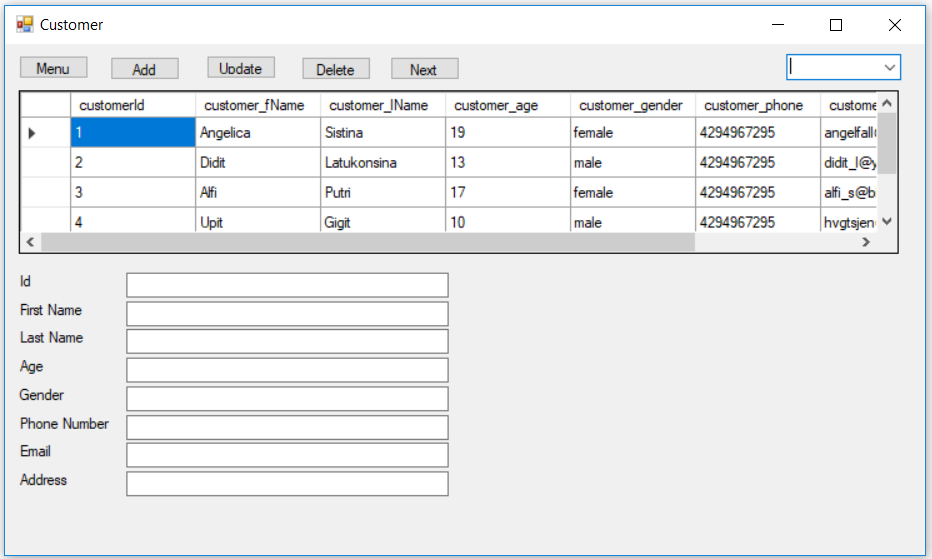
Customer

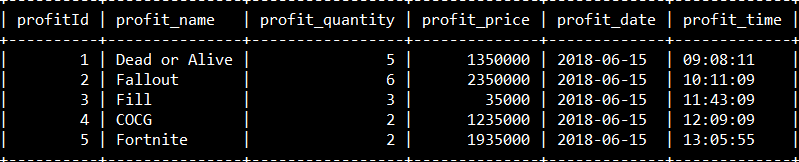
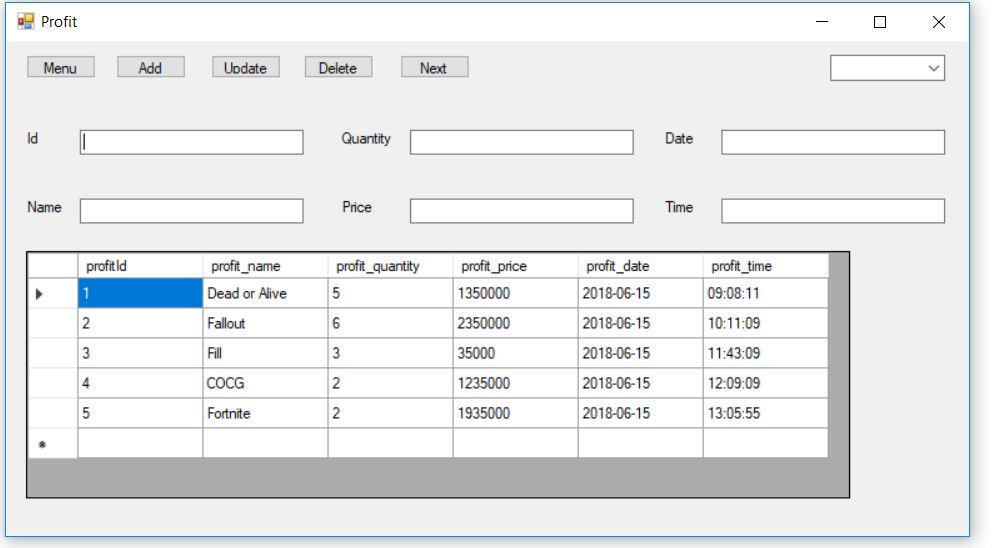
Profit
Transaction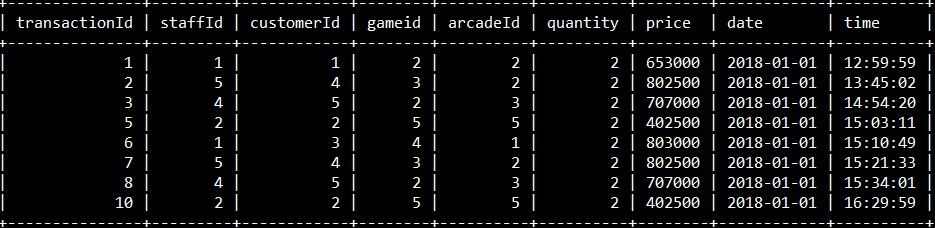
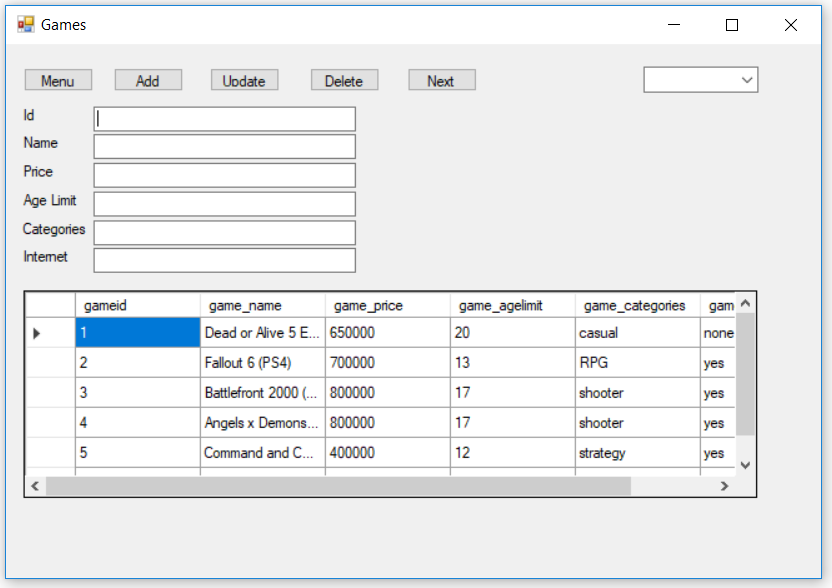
Game
Staff
Application
The offline application was created using Visual Studio (VB.Net)
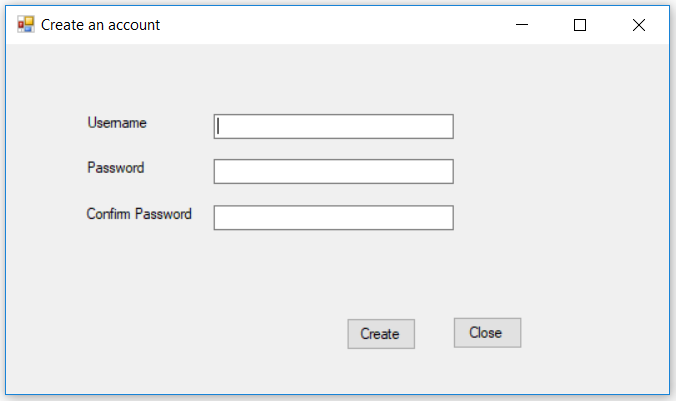
First thing first, the user has to create a new account by clicking the ‘Create an account’ button.

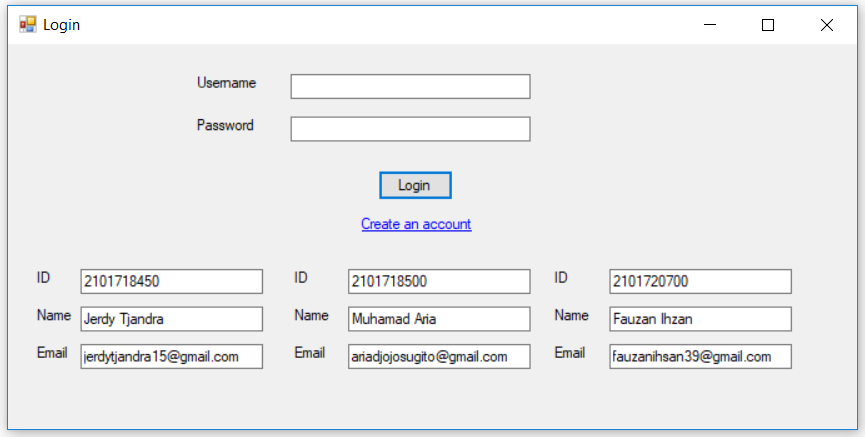
After clicking the ‘Create an account’ button, the user will be directed to the registration page where the user will be required to input the username and the password of his choice.

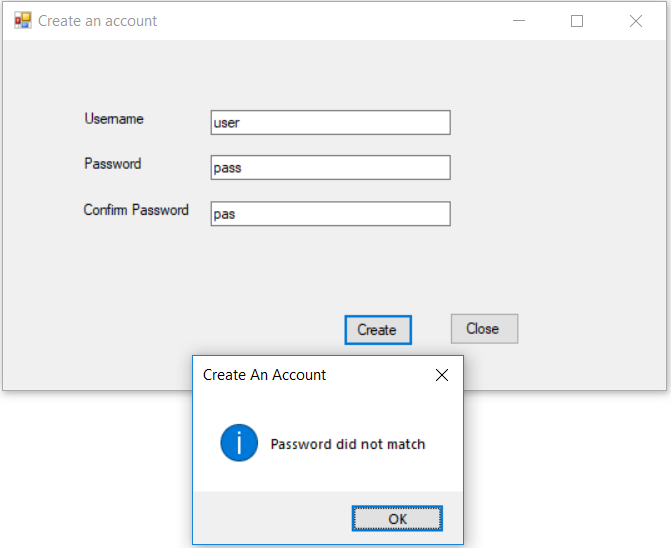
If the password and the confirm password does not match, the user will be asked to refill the form.
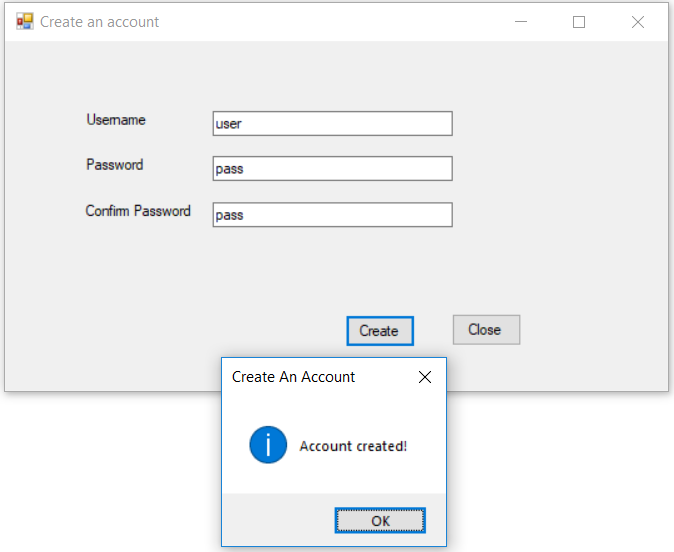
After the password and the confirm password matches, click “Create”, and the user has successfully created an account and will be directed to the login page again.
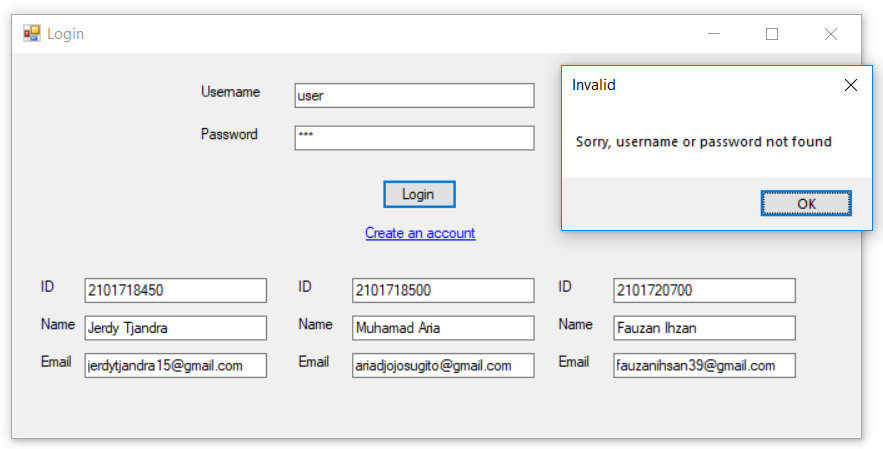
To enter the main menu, the user just have to insert the username and the password.

If the user entered the wrong username and password, the user will be asked to retype the correct username and the correct password.

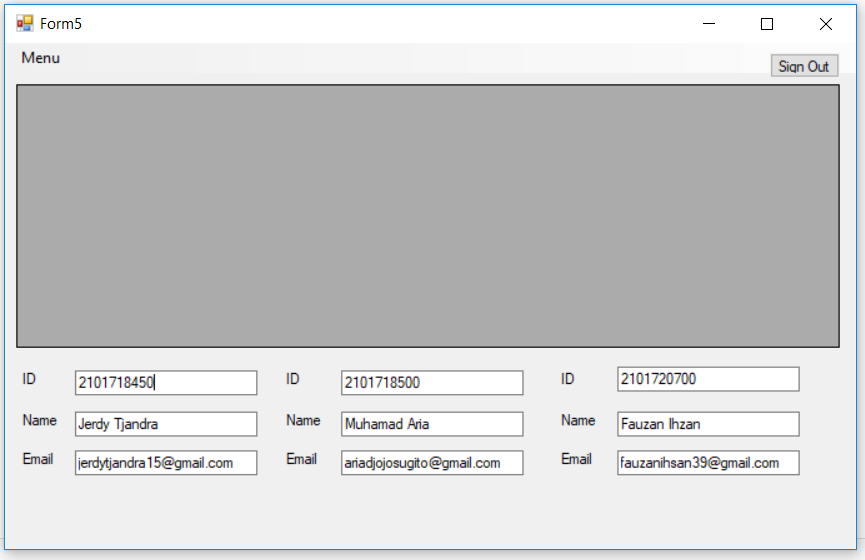
After inserting the correct username and password, the user will be directed to the main menu.
Menu Bar include Open–>Table, Query
Table–>[Arcade],[Customer],[Game],[Profit],[Staff],[Transaction]
Query–>[internet],[No internet],[Shooter],[Fighting],[Racing],[Data of all games and arcade],[Data of all customers and staffs],[Transaction1]
In this section, the user can do the following:
- Click “Arcade”, and the user will be directed to the arcade section
- Click “Customer”, and the user will be directed to the customer section
- Click “Game”, and the user will be directed to the game section
- Click “Profit”, and the user will be directed to the profit section
- Click “Staff”, and the user will be directed to the staff section
- Click “Transaction”, and the user will be directed to the transaction section
- Click the query, and query will appear in the rectangular table.
- Click “Sign Out”, and the user will be signed out.
- Look at the data
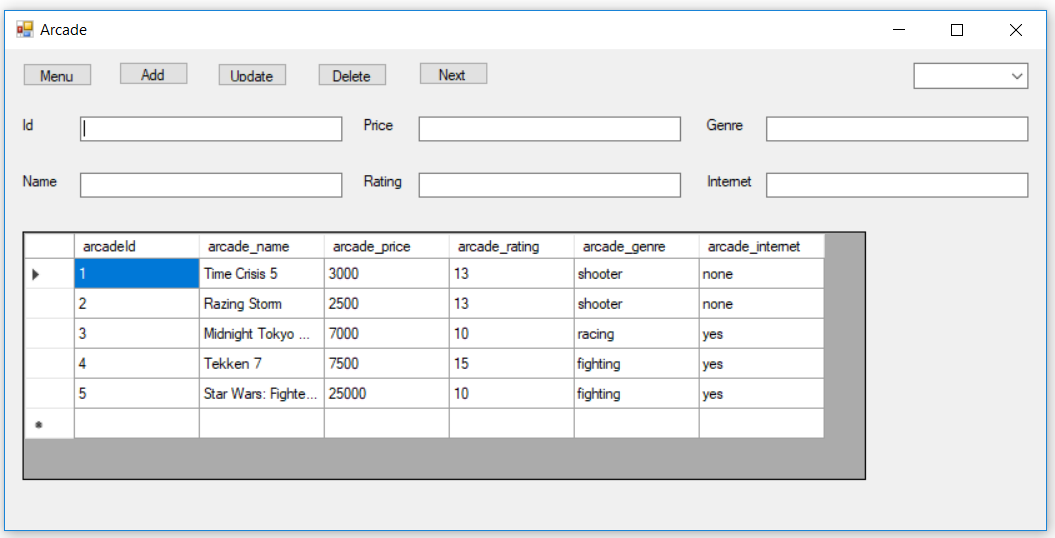
If the user clicks the “Arcade” button, the user will be directed to the arcade page.
In each page, the user can do the following:
- Click “Menu” when the user wants to return to the main menu.
- Add new data by filling the form and by clicking the “Add” button once the user is done.
- Update data of existing arcade collection. First click the “Next” button then fill the white text-box you want to change. Finally, click the “Update” button once you are done.
- Remove the data by clicking “Delete” button. First, click the “Next” button, and the data will appear. If that data you want to remove, click the “Delete” button.
- Click “Next” when you want to see the data after the current data in the same table.
- Click the combo box, and some information/query will appear.
- Look at all the data of our arcade collection.
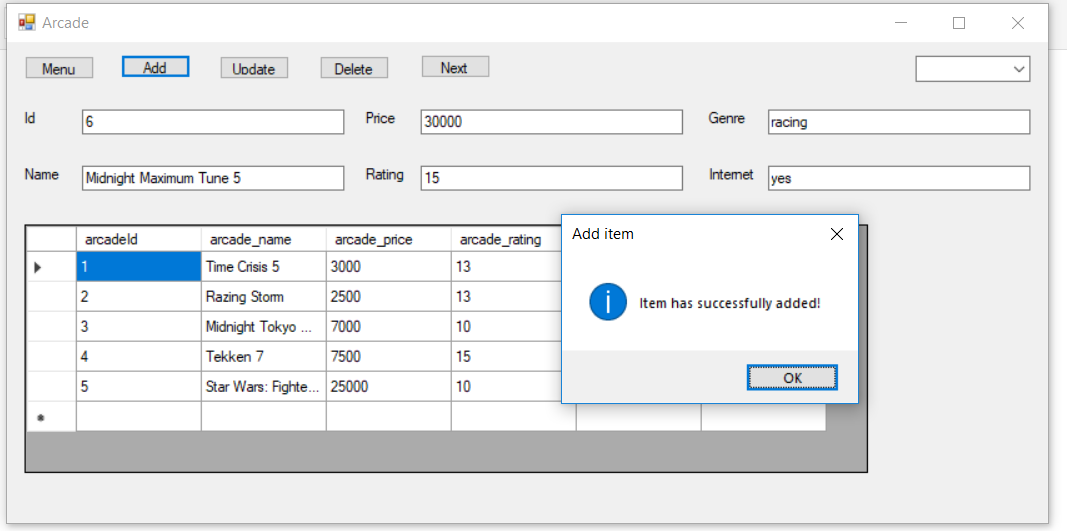
Add Data
Add new data by filling the form and by clicking the “Add” button once the user is done.
Update Data
As we can see the item that we have just added is already in our database, and the item is shown in ID number 6.
Now if we want to update data in ID number 6, first we click the “Next” button until ID number 6 is shown in the id text box. At first, the price of our data is 30 000, we want change it to 50 000 for example. Then, we just change the price text box from 30 000 to 50 000. Finally, we click the “Update” button once we are done.

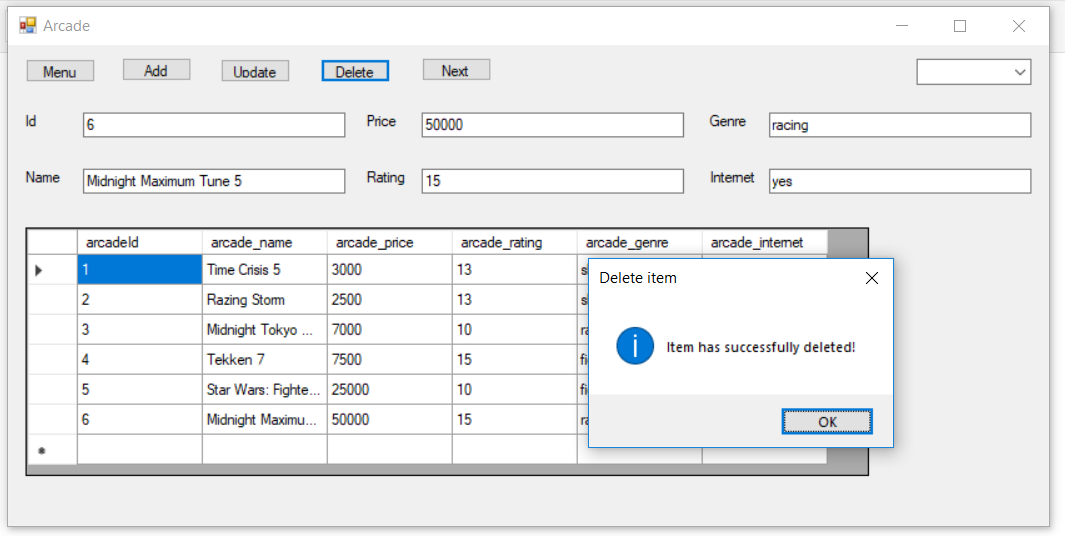
Delete Data
As we can see the item that we have just updated is already in our database, and the item is shown in ID number 6.
Now if we want to delete data in ID number 6, first we click the “Next” button until ID number 6 is shown in the id text box. Then, we click the “Delete” button.
After Delete
We click the “Menu” button and click “Arcade” again.
The picture shown below is the result:
Click the “Menu” button to return to the main menu.
If we click “Customer”, we will be directed to the customer page.
If we click “Game”, we will be directed to the game page.
If we click “Profit”, we will be directed to the profit page.
If we click “Staff”, we will be directed to the staff page.

If we click “Transaction”, we will be directed to the transaction section where we can look at the data of the previous transactions we have made.
![]()
If we click the “Sign Out” button, automatically we will be signed out and directed to the login page again.